
3 key things you need to consider before starting a 3D rendering project
1. What do you want to achieve
Before hiring a 3D rendering studio you first need to ask yourself what the content will be used for. Maybe it’s to get an early concept off the ground for a presentation to council, government, or community consultation. Or perhaps you want to engage potential buyers with high quality photo realistic imagery for a pre-sale marketing campaign. Whatever the project is, there is always something you want to achieve.
Below is a description of the two main image types we see in the 3D rendering industry.
MARKETING IMAGES
These are your WOW factor images, with super high detail, amazing photo realism and attention to detail. This type of work usually comes at a higher cost and takes more time to develop due to the complexity and finessing required. 3D software has come a long way in the last decade, meaning there are more ways than ever to hire someone to produce your 3D renders. However, creating these high-quality marketing images doesn’t just come down to the software or tech, it takes a certain skillset and vast experience to create images that truly capture people’s attention and stand out from the crowd.
PRESENTATION IMAGES
While these images are usually cheaper and take less time to create, by no means are they any less important. It simply comes down to what you want the image to be used for. Typically, presentation images don’t require the same quality because they are usually used for communicating a vision or an idea for a future project. We see these images used in early concept stages for projects such as land & housing estates, masterplans, council presentations and community consultation.
2. Quality, Time, Cost
This is an age-old debate when it comes to 3D rendering and CGI’s, can you get a great looking image at a good price with a quick turnaround time, well the answer is usually ‘You get what you pay for’.
IF YOU WANT QUALITY
If quality is your main driver, then you will generally need to pay a premium and expect a longer timeframe for the work. Make sure you engage your 3D rendering studio as far out as realistically possible when setting up your project timeline. This is important because you need to provide the rendering studio with upfront information such as, how many renders do you need, will you also require animations and fly-throughs, what file types you will need and other important information.
IF YOUR BUDGET IS TIGHT
If your budget is tight and you think you may not be able to afford a full set of high end marketing renders, consider investing your money in 1 or 2 high quality Hero shots. A good 3D rendering studio will be able to guide you in the right direction on what images will create that WOW factor and engage the public.
IF YOU NEED YOUR RENDERS QUICKLY
If you need the renders done quickly be prepared to sacrifice on quality. Think about what you are trying to achieve from the project, if you still want good quality imagery you may need to re-access your project timeframes. Also keep in mind that paying more doesn’t always guarantee higher quality work, the more time a 3D artist has to finesse and style an image, the better the overall product is going to look.
3. Have a strong brief
A great way of getting the most out of your 3D renders all starts with a good design brief, a bit of extra time here will end up saving you a lot of time down the track. While many 3D rendering studios have interior stylists and talented 3D artists, they still need to understand what you are wanting to achieve and what brand identity the project is aiming for. Listed below are some key notes to consider.
TARGET MARKET
It’s important to know your target market and relay this information to your rendering company before starting the project. Who are you marketing to and what is going to engage them?
For example, a new apartment building in the CBD might be aimed at young professionals who are design savvy and enjoy going out, while a new housing estate in the suburbs will be targeted at young families focusing on outdoor living and being close to schools and shops.
IMAGE STYLE
Once we know who the target market is we can start creating the imagery that appeals to your audience. Think about providing some good reference imagery to your 3D renderer showing specific styles of furniture, décor, colours, materials, and the overall look and feel you are wanting to achieve. The rendering studio will then work with this information combined with their knowledge and expertise to create the imagery that will most engage your target audience.

Above is an example of a mood board from a client referencing the overall ‘Look & Feel’ they want to achieve from the 3D renders.
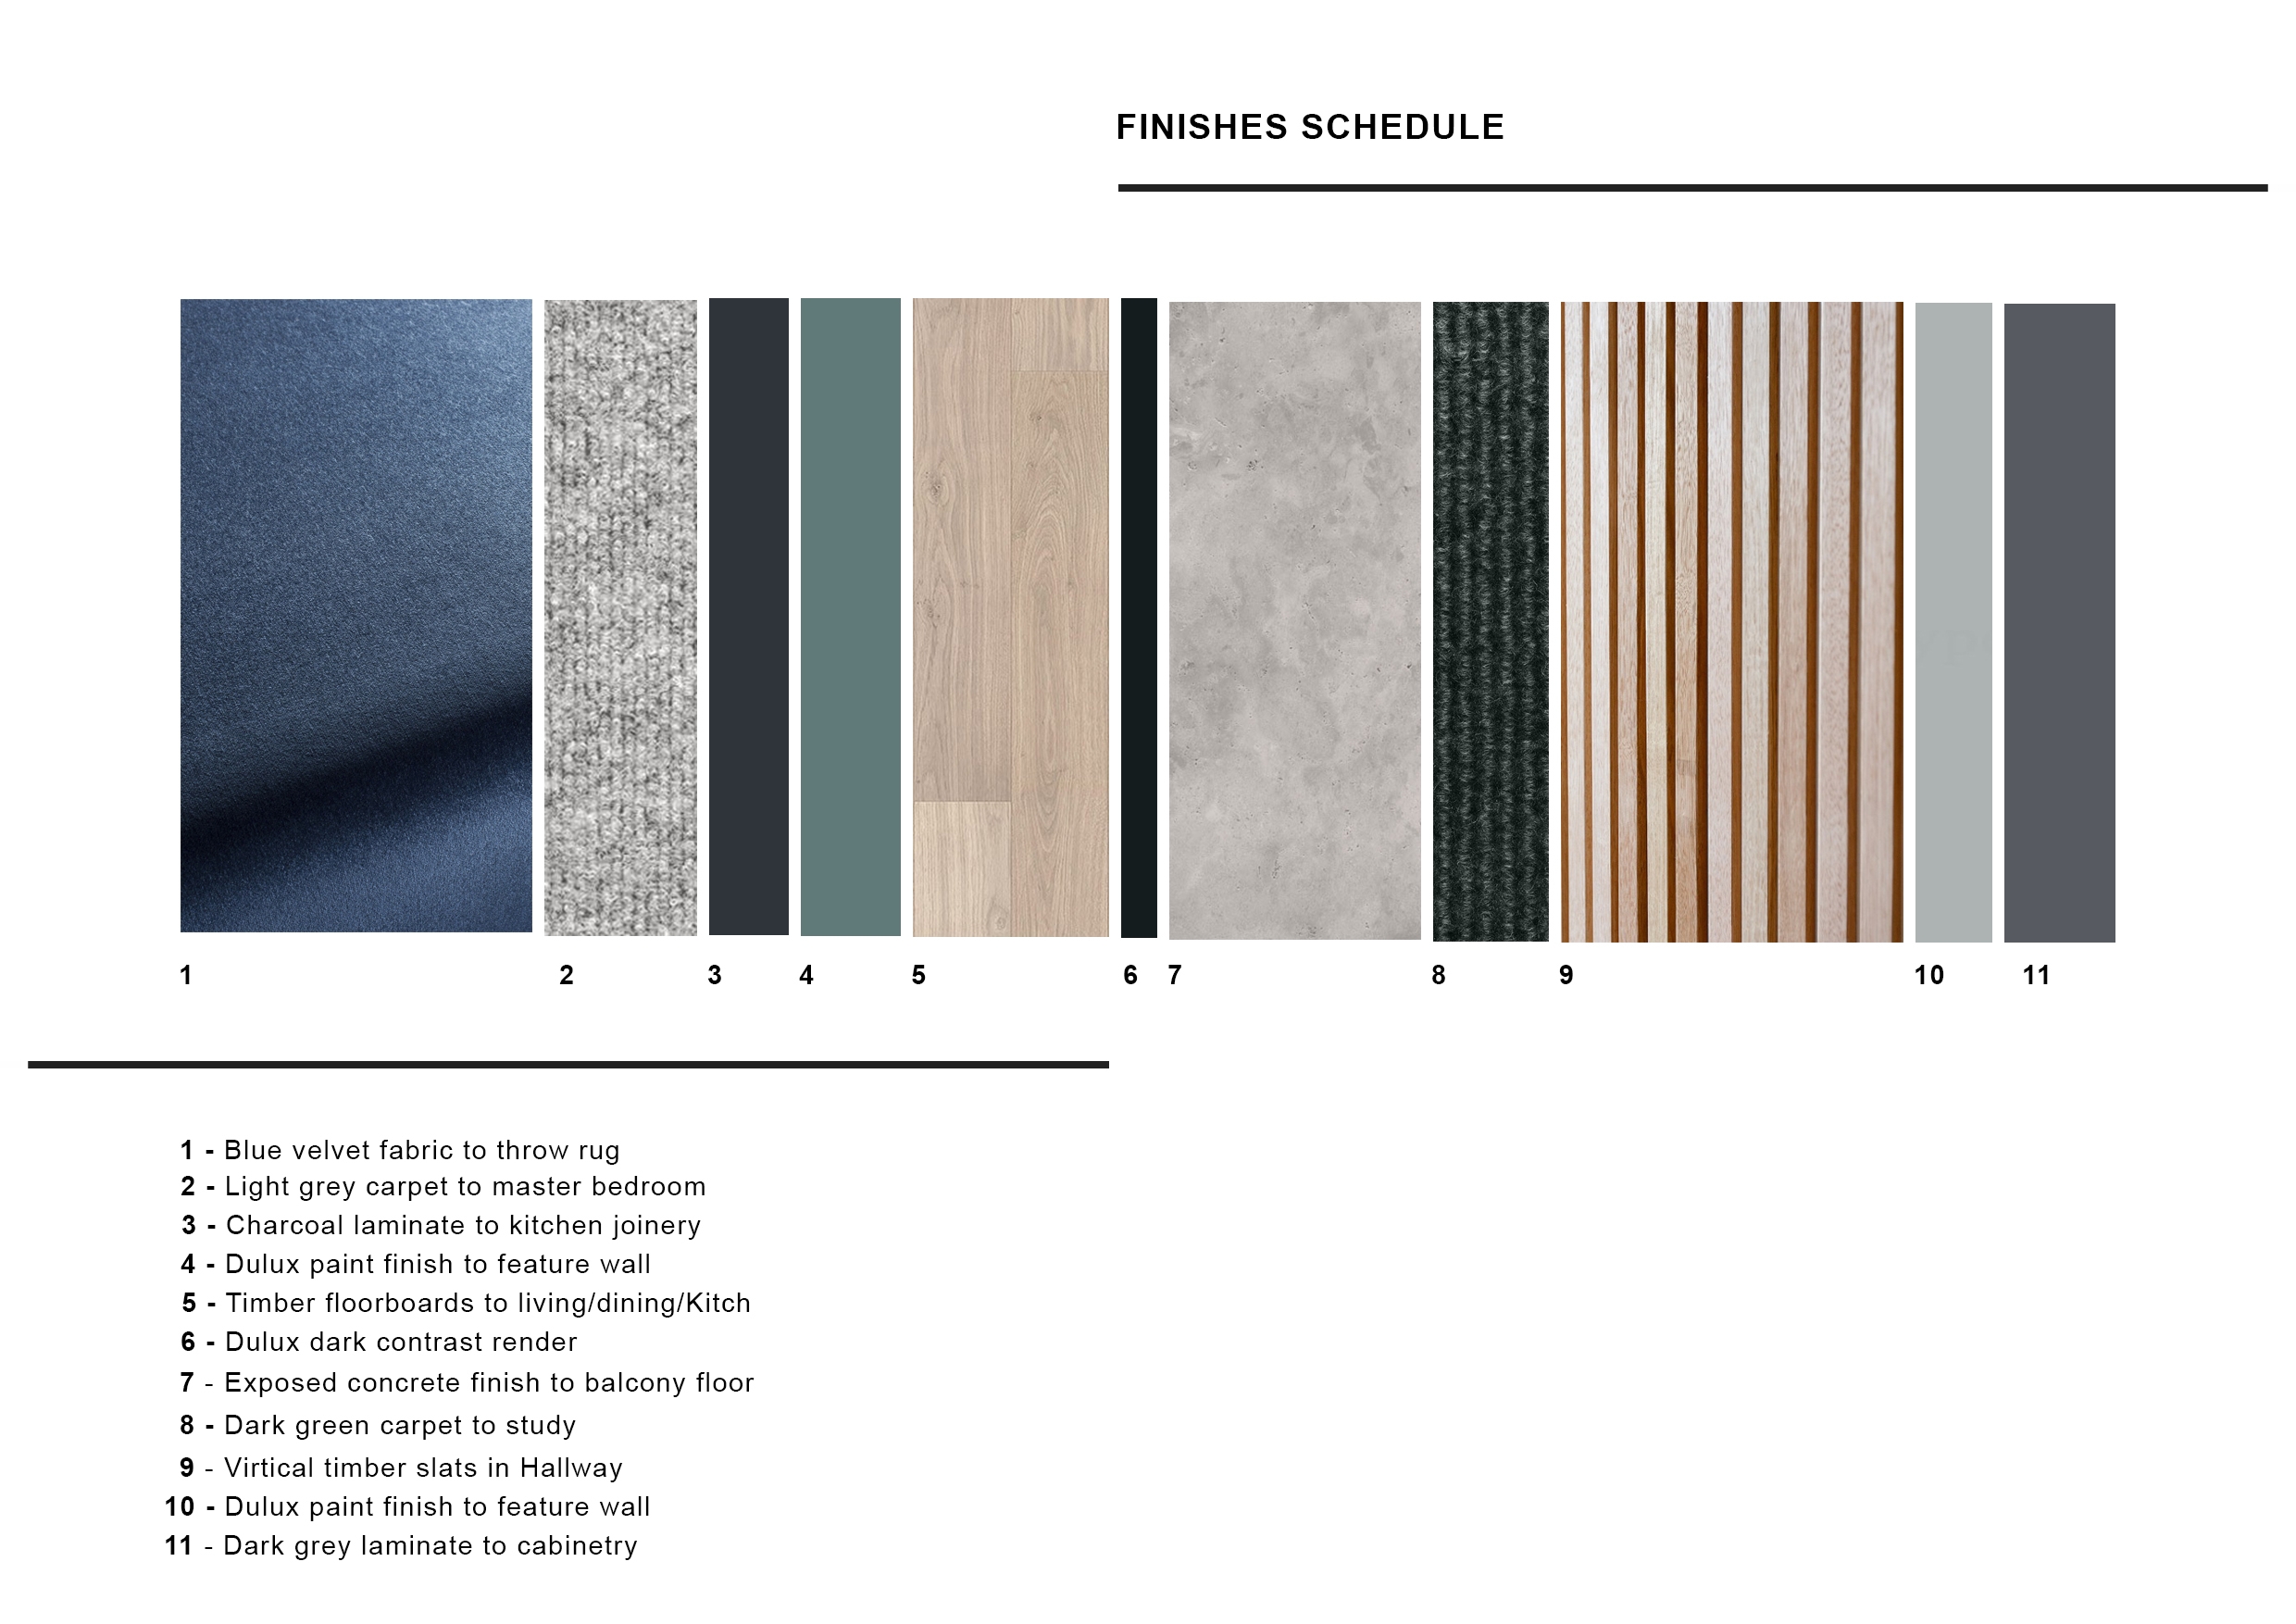
Above is a typical Finishes schedule from a client.
KEY DOCUMENTS
In order to create the 3D renders we need some plans to work from. Below is a list of common documents and design files your render company will require before starting the work.
3D Models – These days most 3D files can be exported into multiple programs, if you are using software that can create a 3D model, sharing this with your 3D Rendering Studio could save significant time. Preferred file types would be - .3ds, .fbx, .dwg, .skp (sketchup), .rvt (revit)
Architectural drawings – Floor Plans, Elevations, Site Plans, Landscaping plan, Room layouts, Electrical and lighting layouts. Prefered file types - .dwg and pdf’s
Material and Finishes schedule – Preferred file types – pdf and jpegs
Landscaping guide – Site plan and reference imagery, Preferred file types, pdf and jpegs
Styling guide and Mood boards – A set of reference images that will help your 3D rendering studio with the overall look and feel you are wanting to achieve. pdf and jpeg
Camera angles – Mark up on the plans the desired areas you want to capture.